OAuth 2.0
For applications to access data on behalf of the user, each request must be authorized based on an access token, which is obtained after successfully authenticating the user in question.
This authorization scheme is based on the standard OAuth2 protocol, which provides several standard authorization grant flows suited for different use cases. For more information, you can refer to the specification described in RFC 6749. There are also many resources online, such as this article.
Insiders API currently supports two authorization grant flows: Authorization Code and Resource Owner Password Credentials. Only one grant flow can be allowed for a given application, but it can be changed anytime by contacting the support.
Authorization Code grant flow
The Authorization Code flow is recommended whenever possible since it does not require storing sensitive user credentials.
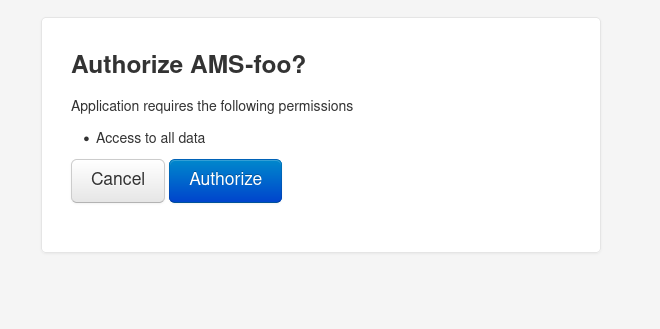
It requires an initial authorization step where the user is redirected to a form on Insiders' website in order to grant or deny access to their data for the application. If access is granted, an authorization code is sent on a callback URL and can be used to generate access tokens.
Resource Owner Password Credentials grant flow
The Resource Owner Password Credentials flow is much simpler than the previous flow, but also less secure as it requires storing user credentials. For this reason it is recommended only for legacy applications, or simple frontend applications that do not communicate with a dedicated server.
With this flow the access token is provided directly in exchange for the user credentials, with no interaction with the user needed.
API client registration
New applications are registered by Insiders administrators upon request. Here is the process to register a new API:
- Fill in the AMS registration form.
- Insiders administrators will process the request, and may ask for additional information.
- Once ready, you will receive their client credentials.
- You can now use your client credentials to obtain access tokens for using the API.
Client configuration
| Key | Value |
|---|---|
| Grant Type | Authorization Code or Resource Owner Password Credentials |
| Callback URL | (Specific to the AMS client) |
| Authorize URL | /oauth2/authorize/ |
| Access token URL | /oauth2/token/ |
| Client ID | (AMS Client ID as provided by Insiders administrators) |
| Client Secret | (AMS Client Secret as provided by Insiders administrators) |
| Scope | all |
| Client Authentication | Basic Auth header |
If needed, the Revoke token URL is /oauth2/revoke-token/.
OAuth specification defines scopes. In this API, only one scope is registered: all. There is no granularity on the user's data that the client can access.
The trailing slash in the URLs are mandatory.
Code examples
Authorization Code
Here is a minimal working example in Python of a backend application implementing OAuth2 authorization using the "Authorization Code" flow.
To get an access token:
- Run the example. You can download a self-contained version here.
- Open http://127.0.0.1:8000/authenticate in your browser
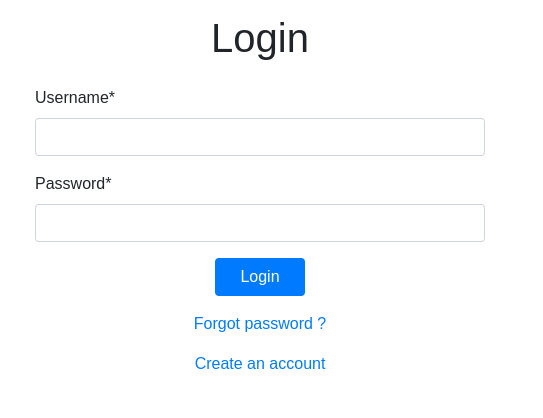
- Create an account if you don't have any
- Log in
- Click "Authorize"
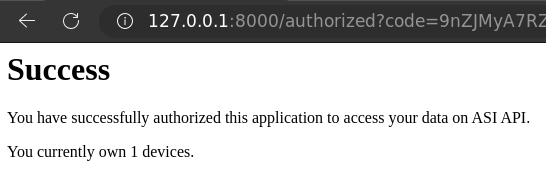
- You should see "Success"
Python code
import fastapi
from fastapi.responses import HTMLResponse
import random
import requests
import urllib.parse


client_id = 'YOUR_CLIENT_ID_HERE'
client_secret = 'YOUR_CLIENT_SECRET_HERE'
redirect_uri = 'http://127.0.0.1:8000/authorized/'  # for local development only

expected_state = None  # don't handle state like this in production, this is just for the example

app = fastapi.FastAPI()


# this endpoint represents the part of your system that prompts the end-user
# for granting access on his behalf
@app.get("/authenticate")
async def authenticate():
    global expected_state
    print(f'(1) authenticating')

    expected_state = random.randbytes(16).hex()  # some random state to prevent CSRF attacks

    # redirecting to Insiders API for login
    return fastapi.responses.RedirectResponse(
        f"https://api.asi.swiss/oauth2/authorize/?"
        f"client_id={client_id}"
        f"&response_type=code"
        f"&redirect_uri={urllib.parse.quote(redirect_uri)}"
        f"&state={expected_state}",
        status_code=302
    )


# this endpoint is called by Insiders API after the user successfully logs in and
# accepts the authorization
@app.get("/authorized")
async def callback(code: str, state: str):
    print(f'(2) app authorized: authcode={code}')

    assert state == expected_state

    print(f'(3) fetching access token on behalf of user')

    tokens = requests.post(
        'https://api.asi.swiss/oauth2/token/',
        data={
            'grant_type': 'authorization_code',
            'code': code,
            'redirect_uri': redirect_uri
        }, verify=False, allow_redirects=False,
        auth=(
            client_id, client_secret
        )
    ).json()

    # the result provides both an access token and a refresh token
    # use the refresh token from now on to renew the access token
    print(f'(3) access granted: token={tokens}')

    # now that we have an access token, we are free to access the
    # user's data and do anything with it

    # for the example here we will just show the user how many
    # devices he currently owns

    response = requests.get(
        f'https://api.asi.swiss/api/v1/devices/',
        params={'current': True},
        headers={'Authorization': f"Bearer {tokens['access_token']}"},
    ).json()

    n_devices = response['count']

    # this is an HTML example but you can do whatever you want after
    # receiving your access token
    html_content = f"""
    <html>
        <head>
            <title>Success</title>
        </head>
        <body>
            <h1>Success</h1>
            <p>You have successfully authorized this application to access your data on Insiders API.</p>
            <p>You currently own {n_devices} devices.</p>
        </body>
    </html>
    """
    return HTMLResponse(content=html_content, status_code=200)
Resource Owner Password Credentials
This Python example shows how to obtain an access token to gain access to user resources by using the user's credentials.
import requests
import json

# Replace the following with your actual client and user credentials
# In production, you may load it from a secured storage
client_id     = 'abc123def456'
client_secret = '789ghi123klm'
username      = "john.doe@example.org"
password      = "mysecurepassword"

data = {
  'grant_type': 'password',
  'username': username,
  'password': password
}

response = requests.post('https://api.asi.swiss/oauth2/token/',
                         data=data,
                         verify=False,
                         allow_redirects=False,
                         auth=(client_id, client_secret)).json()

access_token = response['access_token']

# now that we have an access token, we are free to access the
# user's data and do anything with it

# for the example here we will just show the user how many
# devices he currently owns

devices_list = requests.get(f'https://api.asi.swiss/api/v1/devices/',
                            params={'current': True},
                            headers={'Authorization': f"Bearer {access_token}"},
                            verify=False).json()
Refresh tokens
The simplified examples above only show how to get an access token after obtaining the user's consent or credentials. However, the access token expires after a few hours, which is usually problematic. If using the Authorization Code flow, you have to ask for the user's consent again.
To avoid this, you need to keep the refresh token provided along with the access token. Using the refresh token, you can obtain a new access token without going through the initial authentication step again. Currently, the refresh token does not expire.